Add Two Numbers: Workflow
This tutorial describes a very simple web application that adds two numbers together and displays the result. The addition logic is implemented by a three-node workflow detailed in this topic.
Note | Before being able to save a workflow, you need to have created at least one workflow category to assign the workflow to. See Workflow categories.
Creating a new workflow
To create the new workflow:
- On the portal home page click the Create New Workflow tile. Alternatively, click Workflow > Workflow on the main menu and then click Create on the WorkflowManagement menu.
- The Workflow Studio application launches.
- Login to Workflow Studio with your portal credentials.
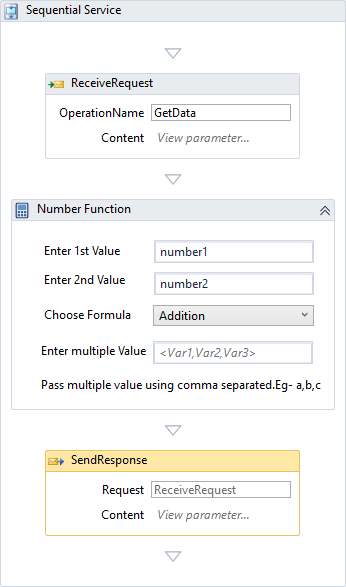
- The default workflow comprises a Sequential Service node containing a ReceiveRequest node to input data, and a SendResponse node to output data.
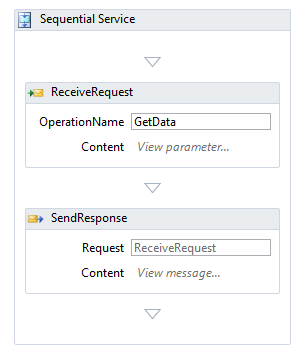
ReceiveRequest node configuration
Warning | Use only alphanumeric characters when configuring parameters in a workflow.
- In the ReceiveRequest node, next to Content, click View parameter.
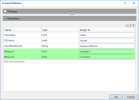
- In the Parameters list, click Add new parameter. Notice that there are already three system parameters in the list; TraceValue, FSIUserId, and TraceWorkflowId.
- Now define the parameter variables; select the ReceiveRequest node.
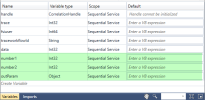
- Click Variables at the bottom left of the workflow area.
- In the Variables list, click Create variable and add three variables:
- Click Variables a second time to close the list.
Adding a Number Function node
This node will perform the number addition.
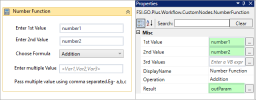
- Drag a Number Function node from the Custom Nodes section of the Toolbox and drop it onto the Sequential Service node between the ReceiveRequest and SendResponse nodes.
- Choose Addition in the Choose Formula list.
SendResponse node configuration
- In the SendResponse node, click in the Content field.
- Select the Parameters section, and click Add new parameter.
- Add a parameter with Name: MyResult, Type: Object, and Value: outParam.
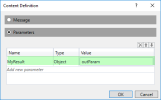
- Click File > Save & Publish. In the pop-up, type a name for the workflow and select a category for it. This example uses the workflow name Adding2Numbers.
- The workflow should now appear in the portal Workflow Management list, showing a status of Published.
The following screenshot illustrates the completed workflow.
Now create the web application page: Add Two Numbers: Web Application.
